Recently, our team shared how to use Split View on lists. As cool as it is to have a Split View in place, however, what if you have way too much data that isn’t really relevant to what you need right now? Wouldn’t it be even better to have a filter in a Salesforce list to break it down to what you want? Maybe have your own personalized list view? It would! And this article will show you how, step by step.
Setting up a Filter in a Salesforce List
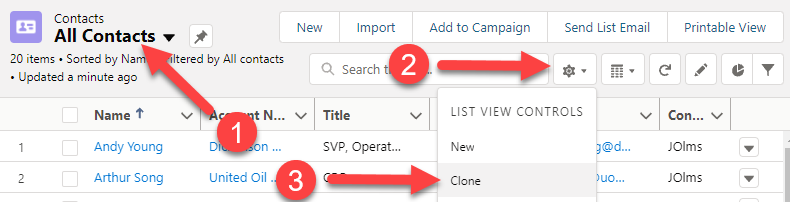
For our example today, let’s prepare a list of filtered contacts. The easiest way is to start with an existing list, in this case, “All Contacts”, and click on Settings, then Clone:
Fill in the popup form with a List Name and decide who can see this list view:
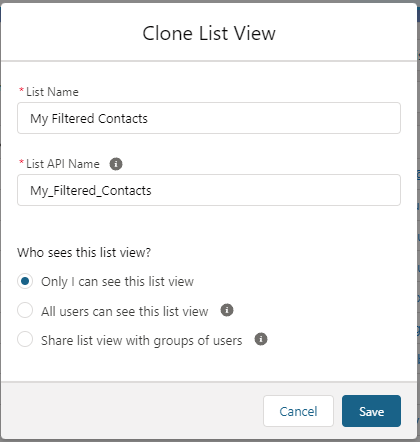
I have selected that “Only I can see this list view”. You might really want to share how awesome this list view is with everyone, but please don’t choose “All users can see this list view”. Not everyone will appreciate you cluttering up their list view options, and it will also make the list view available to Experience users (i.e. Community users). If you really want to share the love, use the last option, “Share list view with groups of users,” and pick all your favorite people.
Show Me the Filters
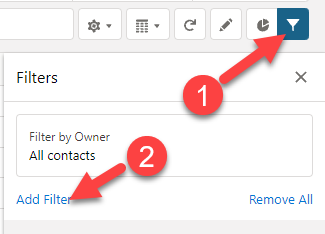
Ok, I know you are getting excited now. On the right sidebar you will see “Filters” (if not, just click the funnel-shaped icon). There is one existing filter there. You can edit it to filter down to contacts that you are the owner of if you like. Beyond that, to add a new filter (and I know this is tricky) just click on “Add Filter”.
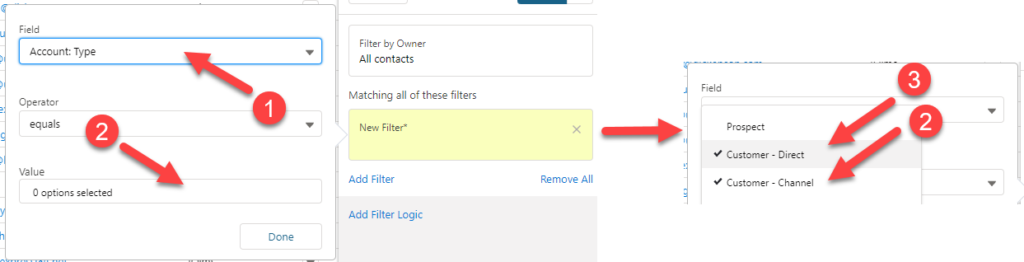
For this example list of contacts, I want to pull in those that are of the “Customer” types. I can simply click to select both of them:
I would also like to filter down to only contacts where the billing state is Arizona or California. Billing State is a text field, so we will need to add two filters to accomplish this: one for Account: Billing State/Province equals AZ, and one for Account: Billing State/Province equals CA. Right now this will NOT produce any results because, by default, it is looking for all these criteria and an Address State cannot be both AZ and CA at the same time. To adjust for this, we will have to “Add Filter Logic”:

Show me the Filter Logic
Take it easy, we’re getting there! When you click the “Add Filter Logic” link, as you see above, you will then see this:
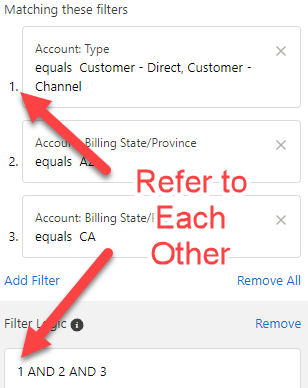
As shown above, the number 1 on the list view represents the same number 1 in the Filter Logic. In our case, we want 1 to always be true but 2 and 3 can be either or. To accomplish this we use the following Filter Logic:
1 AND (2 OR 3)
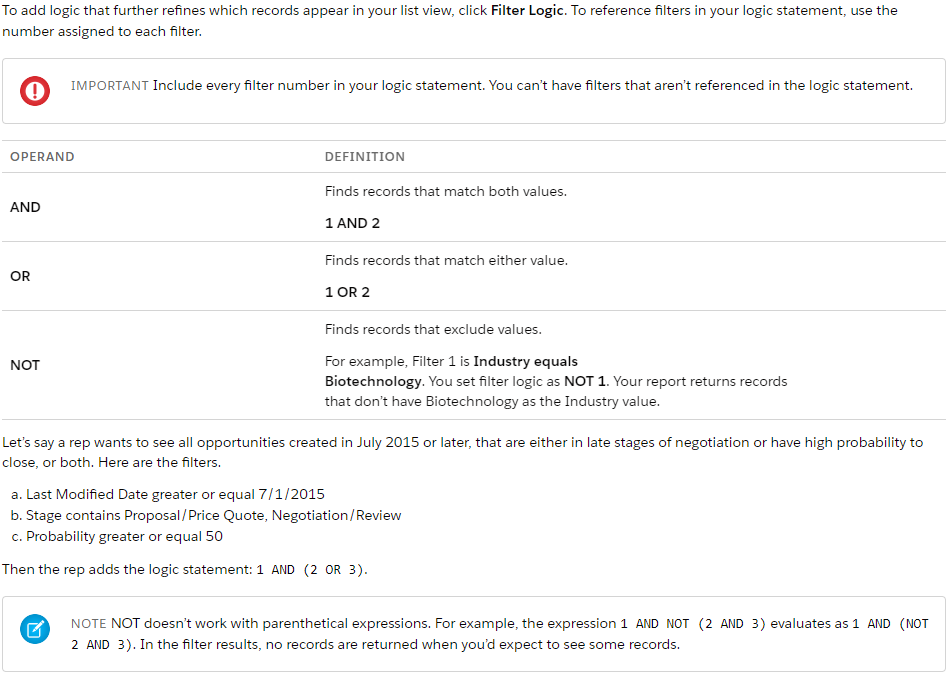
I can hear some of you already: “This is starting to feel a bit like coding!” But don’t worry, you’ll get a handle on it quickly. Salesforce has more information on it too. Here’s a screenshot:
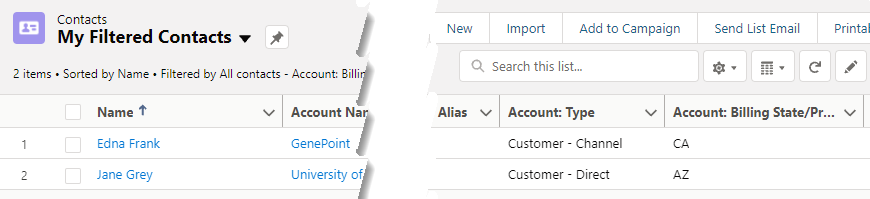
Once you have your Filter Logic as you want, click “Save” and see the results. I have exposed the relevant columns here so you can see the filters at work:
BONUS Filter in a Salesforce List
As a bonus, for the above example where I used Filter Logic, you could also use comma separated variables to accomplish the same thing:

Now that you can use split view AND customize a filter in a Salesforce list, you have a powerful one-two punch that will boost your efficiency and decrease frustrating clutter in your Salesforce views.
If you’ve found this helpful, the Forcemedic team would love to help you learn even more about using your CRM platform and building and customizing it to fit the needs of your organization. Give a shout with the contact button at the bottom of the page!